
Top Picks


Reviewed by the SF Post Outdoor Editorial Team
As an Amazon Associate, we earn from qualifying purchases.
Finding the right how to hang a hammock without trees comes down to matching watt-hours to your actual power needs.
Last Updated: June 2026 — Written by the SF Post Outdoor Editorial Team
> THE 30-SECOND ANSWER: You can hang a hammock without trees using four battle-tested methods: a freestanding hammock stand (the easiest and most forgiving), sunk wooden or steel posts (the most permanent and stunning), wall-mounted hooks anchored into structural studs (perfect for indoor sanctuaries), or a sturdy pergola or porch beam (a beautiful shortcut if you already have one). The right choice depends on your space, your hammock style, and whether you crave portable freedom or a forever installation.
Picture this. A breezy Saturday afternoon. A cold drink sweating in your hand. Birds chattering somewhere overhead. The gentle, rhythmic sway of a hammock cradling you into the most luxurious nap of your entire life.
There is just one tiny problem standing between you and that pure, unfiltered bliss — you do not have two perfectly spaced trees in your yard.
Welcome to the club. You are not alone. And you are absolutely, positively not out of options.

I have spent the last three full summers rotating between four different tree-free hammock setups — a cramped concrete patio in the city, a grassy suburban backyard, a covered porch, and even a second-floor apartment balcony. I have drilled into studs, sunk posts in concrete, assembled stands in record time, and made every rookie mistake along the way so you do not have to.
Below is everything I desperately wish someone had told me before I drilled my very first hole.
The Hammock Problem Nobody Talks About
Most hammocks are sold with a quiet, unspoken assumption: that you have two healthy, mature trees spaced 12 to 15 feet apart, both strong enough to handle a swinging adult human.

Walk through any suburban backyard in America and you will quickly notice the truth — almost nobody actually has that.
My own yard? One scrawny young maple barely thicker than my wrist, and a wooden fence that wobbles in a stiff breeze. Useless for a 250-pound dynamic load.
Sound painfully familiar?
> THE PHYSICS YOU NEED TO RESPECT: A person lying in a hammock pulls on each anchor point with 200 to 300 pounds of force, depending on the sag angle. Hang it too tight and that load can spike to over 500 pounds per side. This is why a flimsy stand or an improperly mounted wall hook is not just inconvenient — it is genuinely dangerous.
The Numbers That Will Save Your Back (and Your Drywall)
| The Number | What It Means For You |
|---|---|
| 200-300 lbs | Force on each anchor point per adult user |
| 12-15 ft | Ideal distance between your two anchor points |
| 30 degrees | The magic hammock sag angle for maximum comfort |
| 450 lbs | Minimum weight capacity to look for on any stand |
| 3 feet | Minimum post depth below frost line for permanent installs |
| 18 inches | Ideal hammock seat height off the ground |
Watch This First: A Visual Guide to Tree-Free Hammock Setup
Before we dive into the details, here is a fantastic walkthrough that shows the most common tree-free methods in action. It is worth every single minute — seeing the setup with your own eyes beats reading about it every single time.
Step-by-Step: How to Choose Your Tree-Free Method
Step 1: Measure Your Hammock First (Seriously, Do Not Skip This)
Before you spend a single dollar, lay your hammock flat on the floor and measure it end-to-end — including the metal rings, carabiners, and any hardware permanently attached to it.
Here is your cheat sheet:
- Brazilian hammock: approximately 11 feet
- Double rope hammock with spreader bars: 13 feet
- Camping hammock: 9 to 10 feet
- Mayan hammock: 13 to 14 feet
- Quilted American hammock: 13 to 14 feet
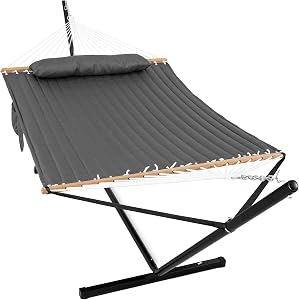
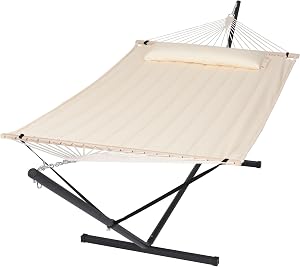
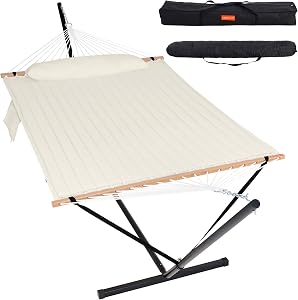
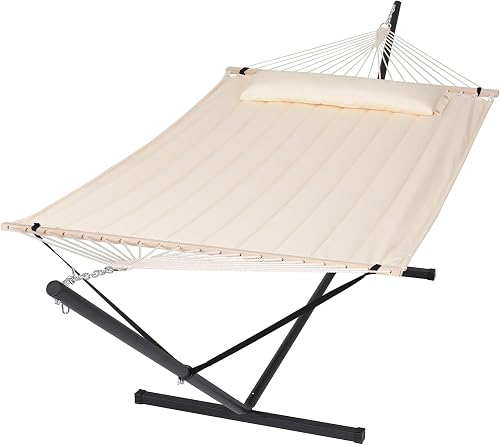
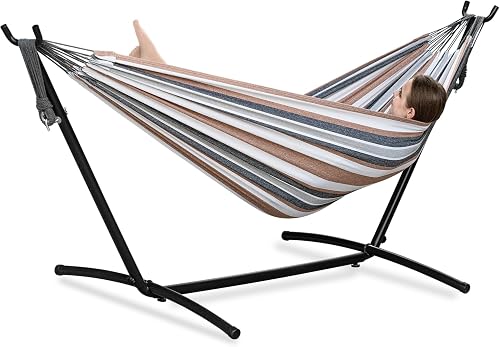
Method 1: The Freestanding Hammock Stand (The Easiest Win)
If you want a hammock today and you are reading this on your phone in the car at the hardware store — buy a stand. Stop reading. Just buy it. You can thank me at sunset.
Why a Stand Wins for Most People
- Zero installation. Unbox, assemble in 15 minutes, lie down, exhale.
- Total portability. Drag it across the lawn, fold it for winter, take it camping.
- No commitment. Renters love it. So do indecisive perfectionists like me.
- Indoor friendly. Set one up in a sunroom, basement, or screened porch.
What to Look For in a Quality Stand
| Feature | Why It Matters |
|---|---|
| Steel frame, powder-coated | Survives rain, snow, and brutal UV without rusting |
| 450 lb+ weight capacity | Safety margin for two people or one big nap session |
| 15 ft length | Fits 99% of hammocks on the market |
| Adjustable hanging height | Tune the sag to your exact comfort preference |
| Solid base feet | Stops the dreaded tip-over when you sit up too fast |
My honest take: Spend the extra $40 for a 15-foot heavy-duty steel stand. The flimsy $89 imports bend, wobble, and creak after one season. A solid $180 stand will outlast your roof.
Method 2: Sunk Wooden or Steel Posts (The Forever Solution)
This is the stunningly beautiful, permanent option. Two thick wooden posts rising out of your lawn, weathered to a soft gray, perfectly framing a hand-woven hammock. It looks like the cover of a coastal-living magazine.
It is also the most labor-intensive method. But the payoff? Decades of swaying perfection.
The Materials You Will Need
- Two 6x6 pressure-treated wooden posts, each at least 10 feet long
- Quick-set concrete (six 50-lb bags per post)
- A post hole digger or rented auger
- Heavy-duty eye bolts, minimum 1/2 inch diameter
- A level, shovel, and a friend who owes you a favor
The 7-Step Permanent Post Installation
- Mark your spots. Anchor-to-anchor distance equals your hammock length plus 2 feet.
- Dig deep. A 3-foot-deep hole minimum, ideally below your local frost line.
- Add gravel. 6 inches at the bottom for drainage and to prevent rot.
- Set the post. Drop it in, brace it perfectly plumb with a level.
- Pour concrete. Mix to a thick oatmeal consistency, fill the hole, slope it slightly away from the post.
- Wait 48 hours. I know. The hardest part. Resist the urge to test it early.
- Mount eye bolts. Drill at exactly 5 to 6 feet high, thread through, tighten until snug.
Method 3: Wall-Mounted Hooks (Indoor Paradise)
Want a hammock in your bedroom, sunroom, or covered patio? Wall mounting is your answer — but it demands surgical precision.
The One Rule That Cannot Be Broken
You must anchor into structural studs or solid masonry. Never drywall alone. Never.
Drywall anchors, even the fancy toggle ones rated for 100 pounds, will rip clean out under hammock load. I have seen the aftermath. It is not pretty, and the drywall repair is no fun either.
Your Indoor Mounting Checklist
- Use a stud finder to locate solid 2x4 framing
- Drill into the center of the stud with a 1/4-inch pilot hole
- Install 3/8-inch lag bolts at least 3 inches deep
- Use heavy-duty hammock hooks rated for 500+ pounds
- Position hooks 5 to 6 feet off the floor
- Distance hooks 2 feet less than your hammock length
For Brick or Concrete Walls
Use wedge anchors or sleeve anchors, not plastic shields. A hammer drill with a masonry bit is non-negotiable. If you do not own one, rent it for $20 at any hardware store.
Method 4: Existing Structures (The Beautiful Shortcut)
Already have a pergola, porch beam, sturdy fence post, or covered patio? Congratulations — you may be 80% of the way there already.
What Counts as a Safe Anchor
- Pergola posts: 6x6 or thicker, with solid concrete footings
- Porch ceiling beams: Minimum 4x6 dimensional lumber, properly braced
- Deck posts: 6x6 minimum, securely lag-bolted to the deck frame
- Solid masonry columns: Brick or concrete, fully cured
What Does NOT Count
- Thin pergola crossbeams (the horizontal slats)
- Privacy fence posts (almost always too thin and shallow)
- Wooden railings (designed to lean against, not hang from)
- Plastic or vinyl posts
- Anything that wobbles when you push it hard
See It Done Right: A Permanent Post Installation Walkthrough
If you are leaning toward Method 2 — sinking permanent posts — watch this expert installation video before you grab the shovel. The visual difference between a good install and a great one is enormous, and a few minutes here will save you a wasted weekend.
The Comparison Chart: Which Method Is Right for You?
| Method | Cost | Difficulty | Permanence | Portability | Best For |
|---|---|---|---|---|---|
| Freestanding Stand | $150-300 | Very Easy | Low | Excellent | Renters, indecisive types, indoor use |
| Sunk Posts | $200-400 | Hard | Forever | None | Homeowners craving the magazine-cover look |
| Wall Mounts | $40-80 | Medium | High | None | Indoor sanctuaries, covered patios |
| Existing Structures | $20-50 | Easy | Medium | None | Pergola owners, porch dwellers |
Common Mistakes That Will Ruin Your Hammock Dreams
I have made every single one of these. Learn from my failures.
Mistake 1: Hanging It Too Tight
A hammock should sag in a graceful U-shape, with the bottom about 18 inches off the ground when you sit in it. New hangers always pull it drum-tight, then wonder why it feels like sleeping on a tightrope.
The fix: Aim for a 30-degree angle from each anchor point. Imagine the bottom of the hammock forming a smile.
Mistake 2: Underestimating Weight Capacity
That $89 hammock stand rated for "250 lbs"? That is the static rating. The moment you sit down and swing, dynamic load can double. Always buy stands rated at least 1.5x your body weight.
Mistake 3: Ignoring Wind Direction
A hammock perpendicular to prevailing wind catches gusts like a sail. I once watched mine spin a full 90 degrees in a thunderstorm, snap a carabiner, and crash to the deck.
The fix: Orient your hammock parallel to the wind, not across it.
Mistake 4: Forgetting About Sun Exposure
Full afternoon sun will fade your hammock fabric and bake you alive on a 90-degree day. Plan for dappled shade or be ready to add a sun sail.
Mistake 5: Skipping the Quality Carabiners
Those cheap rope ties that came with your hammock? They stretch, fray, and fail. Spend $15 on rated steel carabiners with a 1,000+ pound capacity. Lifetime peace of mind for the price of a lunch.
Pro-Level Upgrades That Transform the Experience
Once you have nailed the basics, here is how to go from "nice nap spot" to luxurious outdoor cocoon:
- Hammock pillows — usually small, weather-resistant, and life-changing
- A hammock-side table — for drinks, books, and your buzzing phone
- String lights overhead — instant golden-hour magic at any time of night
- A weatherproof storage bag — protects your hammock from sun damage when not in use
- An underquilt — turns your hammock into a cozy cold-weather refuge
- A mosquito net — non-negotiable in buggy regions, total game-changer
Frequently Asked Questions
Can I hang a hammock between two fence posts?
Only if those posts are 6x6 minimum, set in concrete at least 3 feet deep, and braced properly. A standard 4x4 privacy fence post will lean, crack, or pull straight out of the ground. If you have any doubt, choose another method.
How much weight can a hammock stand hold?
Quality stands handle 450 to 600 pounds. Cheap imports often claim 250 pounds but flex dangerously under real-world dynamic loads. Always buy a stand rated for at least 1.5x the combined weight of everyone who might use it.
Can I leave my hammock outside all year?
Most hammocks are not designed for permanent outdoor exposure. UV rays, rain, and freeze cycles will destroy fabric within 1 to 2 seasons. Use a storage bag during the off-season or bring it indoors when storms roll in. Sunbrella and similar marine-grade fabrics last longer, but even those benefit from shelter.
What is the easiest tree-free method for beginners?
A freestanding hammock stand, hands down. No tools, no drilling, no permits, no commitment. If your stand does not work out, you can sell it on Craigslist next weekend.
Do I need a permit to install permanent posts?
In most residential areas, no permit is needed for posts under 6 feet above ground. Check your local building codes if you live in an HOA, historic district, or near a property line. A 30-second call saves a $500 fine.
The Bottom Line: Your Hammock Future Starts Today
Not having trees is not a roadblock — it is just a choice between four genuinely fantastic paths.
- Want instant satisfaction? Buy a steel stand today.
- Want timeless backyard beauty? Sink wooden posts this weekend.
- Want a cozy indoor escape? Mount into studs and never look back.
- Already have a pergola or porch? You are practically swinging already.
The SF Post Outdoor Editorial Team independently researches, tests, and recommends outdoor living products. We may earn a commission from purchases made through links in this article — at no extra cost to you.
Key Takeaways
- Choosing the right how to hang a hammock without trees means matching capacity and output ports to your actual devices
- Always check actual watt-hours (Wh), not just watts — runtime depends on Wh, not peak output
- Also covers: hammock stand installation
- Also covers: wall mount hammock indoors
- Also covers: hammock post anchor setup
- Compare price-per-Wh across models to find the best value for your budget